Search Results
7 results found with an empty search
- Shepherd's Pie
This classical Shepherd's Pie recipe will have everyone asking for seconds. It's full of flavor and the creamy mashed potatoes make it extra delicious! It is comfort food at its finest and definitely delicious. I have made this recipe dozens of times and it’s finally making its debut on the blog! Making this recipe with ground beef is traditionally called ‘Cottage Pie’. But since it’s mostly known as ‘Shepherd’s Pie’ that is what I call it. A delicious filling with lots of gravy underneath a fluffy layer of mashed potatoes - perfect for a cold night, or as a special St. Patrick's Day treat. I always use regular mashed potatoes, but if you're in a hurry, instant mashed potatoes work as well! Simple, but just as comforting. Ingredient notes Wine: You can skip the wine and use more broth instead. If you’re not sure which wine to use, go for a dry red wine you would also drink. A Merlot or Pinot Noir is great. (You can technically use cooking wine, it’s just not my preference – if you do use seasoned cooking wine, make sure to taste test and pay attention to the amount of salt you add.) Tomato paste: Can also use ketchup instead if you don’t have tomato paste. Mashed potatoes: I usually make my Instant Pot Mashed Potatoes for this, but my regular mashed potatoes are delicious, too. I’ve also had readers made this with ready-made mashed potatoes, so that’s a great shortcut. Allergy friendliness: For a gluten-free friendly version, use cornstarch in place of the flour. Be sure to check all of your ingredients to make sure they’re gluten free (especially the beef broth! you can use water if you don’t have any). If you don’t like peas, it’s also delicious with chopped green beans. I hear people make this low carb by using mashed cauliflower they whisk together with 1 egg yolk in place of the mashed potatoes. I love my potatoes, but your call You can also make this vegetarian by using 2 cups of cooked, brown lentils in place of the ground beef and vegetable broth in place of the beef broth. Beef or Lamb? It might we worth telling you right now that the technical term for this recipe is actually cottage pie (made with ground beef) and not authentic shepherd’s pie (made with ground lamb). But my mission here is always to share recipes real people with a real grocery budget and a regular grocery store and an everyday exhausting kids/work/life situation can make. So, there it is. Fake Shepherd’s Pie. Aka Homemade Shepherd’s Pie with ground beef. One that’s simple and affordable and delicious . Feel free to use ground lamb in place of the beef for a more authentic version! Lamb tends to be fattier, so drain it after browning if you prefer less fat. Steps to make a shepherd’s pie On medium heat, brown your ground beef or lamb in a pan. Season with salt and pepper. You can also add diced onion and garlic for extra flavor. Add in your seasonings and tomato paste. Add in the flour to create the rue. Add in the red wine and broth. Simmer for 5 - 10 minutes so the ground beef soaks in all the flavors. Add in the peas and carrots and simmer for another 5-10 minutes until the mixture has thickened and the vegetables have softened. Transfer the filling to a casserole dish. Top with the mashed potatoes and shredded cheese (optional). Bake in the oven for 20-30 minutes until the mashed potato layer is golden and bubbly. Recipe tips Don’t be scared of adding some color: Make sure to brown the meat and vegetables well for the most intense flavors Do not skip cooling the filling: This is how you keep the layers in shepherd’s pie from mixing; depending on the dish and the room temperature, cool it for 15-30 minutes (sometimes I put mine outside in the winter, it’s cold in 15 minutes!) Make ahead instructions Assemble the entire pie as directed in the recipe, right up to the finally baking step. Cover and refrigerate for up to 3 days, then bake at 400°F for 30-40 minutes, or until the filling is bubbly and the top is golden. Freezer instructions Prepare as directed in the recipe, right up to the final baking step. Wrap well with foil and then aluminum foil. Label and freeze for up to 2 months. To reheat: No need to defrost! Remove both foils, then replace the aluminum foil. Bake at 400°F with the foil on for 1 hour. Remove the foil and bake for another 10 minutes, until browned. Shepherd's Pie INGREDIENTS POTATO LAYER 3 large russet potatoes 2 tablespoons butter 1/2 cup milk 1 teaspoon garlic powder salt to taste MEAT LAYER 2 pounds ground beef or lamb 1 small onion, chopped 2 cloves garlic, minced 1/2 teaspoon each salt and pepper 2 tablespoons flour 2 tablespoons tomato paste 1 cup beef broth 1/2 tablespoon Worcestershire sauce 1/2 teaspoon dried oregano 1 1/2 cups frozen peas and carrots 1 cup shredded cheddar cheese INSTRUCTIONS FOR THE POTATO LAYER Peel the potatoes and chop into small pieces. Place chopped potatoes in a large pot of water. Bring to a boil and cook until potatoes are tender. (About 15-20 minutes) Drain water from pot. Mash the potatoes. Add the butter, milk, garlic powder and salt. Continue to mash until no lumps remain. Cover potatoes and set aside. Preheat oven to 375°F. Grease a 9 x 13-inch baking dish with non-stick spray. FOR THE MEAT LAYER In a large 12-inch skillet, over medium-high heat, add ground beef (or lamb), onion, garlic, salt and pepper. Cook and crumble meat until browned. Drain grease. Sprinkle flour evenly over meat mixture. Stir and cook 1 minute. Stir in tomato paste, broth, Worcestershire sauce and oregano. Bring to a boil, then reduce heat to medium-low. Stir in frozen peas and carrots. Cook another 5 to 10 minutes or until heated through. Pour meat mixture into a prepared pan. Spread mashed potatoes evenly over the top. Top potatoes with cheddar cheese. Bake, uncovered, for 35 minutes until casserole is hot and bubbly. Remove from the oven and let stand for 10 minutes before serving.
- Pumpkin Muffins
Adult and child approved ... these pumpkin muffins are hard to beat! Enjoy them as your breakfast on a busy morning, or as a afternoon snack with a cup of coffee! These pumpkin muffins are so versatile, you can add any topping you want, and you cannot go wrong! My personal favorites are flaky sea salt, chocolate chips and streusel, but you can literally add whatever topping you want and it will still taste divine! How to Make Begin by combining the flour, salt, baking powder, baking soda, and spices. Whisk well and set aside. Combine butter and sugar in a large bowl or in the bowl of an electric mixer. Beat until just combined. It will look a little crumbly. Add in the eggs one at a time, beating well after each addition. Continue beating for a few minutes until light and fluffy. Add in the pumpkin. Beat until combined. It will look a little grainy but that's okay. Add the dry ingredients to the pumpkin mixture. Beat on low speed until just combined. Transfer the batter to muffin pan lined with muffin cups or sprayed with pan spray. Bake for 14-20 minutes at 400°F or until a toothpick inserted into the center comes out clean. Let the muffins cool in the pan for about 10 minutes, then transfer them to a rack to they can cool completely. Tips and Tricks This recipe calls for pumpkin pie spice which is a combination of cinnamon, ginger, nutmeg, allspice and cloves. Don't have any pumpkin pie spice? No problem, you can make your own in way less time than you can run to the store and pick some up! Make sure you use pumpkin puree in this recipe and not pumpkin pie filling. They are usually sold right near each other, often in the same size can. Pumpkin puree is simply pumpkin that's been cooked and pureed. Pumpkin pie filling is pumpkin puree as well as sugar and spices. If you're in a hurry or just want to keep things a little simpler, a sprinkle of raw or regular granulated sugar before baking. PUMPKIN MUFFINS INGREDIENTS 2 cups all-purpose flour 1/2 teaspoon salt 1 teaspoon baking soda 1/2 teaspoon baking powder 1 teaspoon ground cloves 1 teaspoon ground cinnamon 1 teaspoon ground nutmeg 1-1/2 sticks (3/4 cup) unsalted butter, softened 2 cups granulated sugar 2 large eggs 1, 15-oz can 100% pure pumpkin INSTRUCTIONS Preheat oven to 400°F. Line or grease a muffin pan and set aside for later. In a medium bowl, combine the flour, salt, baking soda, baking powder, cloves, cinnamon and nutmeg. Whisk until well combined; set aside. In a large bowl or an electric mixer, beat the butter and sugar on medium speed until just blended. Add in the eggs one at a time, beating well after each addition. Continue beating until very light and fluffy. Beat in the pumpkin. The mixture might look grainy and curdled, but that's normal. Add the flour mixture and mix on low speed until combined. Evenly distribute the batter between the muffin cups and bake for 15-20 minutes or until a toothpick inserted in the center comes out clean. Let the muffins cool in the pan for 10 minutes, then transfer them to a wire rack to cool completely.
- Mummy Oreo Balls and Rice Krispies
In need of some last minute, but quick and easy Halloween treats? You can make these mummy rice Krispie treats and Oreo balls with simple ingredients you probably already have at home! For the Rice Krispies: They're cute, they're spooky and they're everything a Halloween party should be - without any of the complicated baking. What you'll need: 3 tablespoons butter 6 cups rice Krispie cereal 1 tsp vanilla extract 1 package regular or jumbo marshmallows White chocolate candy melts Candy eyeballs In a large pot over medium heat, melt the butter. Add in the marshmallows and stir continuously until they're melted and gooey. Remove from heat and add in the vanilla extract for a little kick in flavor. Immediately stir in the Rice Krispie cereal. Mix it until all the cereal is fully coated in the marshmallow. Press the mixture down slightly into a greased 9 X 9 pan to create your base layer. I like to spray my spatula with cooking spray to it doesn't stick. Allow the Rice Krispies to sit at room temperature until set (about 20 minutes). Cut into 12 even, rectangular pieces. In a small microwave-safe bowl, melt the white chocolate chips in 30 second intervals, stirring in between until smooth. This will make your mummy bandages. Use a spoon or a pipping back to drizzle the melted chocolate over the Rice Krispies in a messy crisscross pattern. Before the chocolate hardens all the way, press two cany eyes into each mummy giving them that adorable (or spooky) look. Let the white chocolate finish hardening and you've just created the cutest mummies ever! For the Oreo Balls: If you're looking for a fun, easy and delicious Halloween dessert this year, these mummy Oreo balls fit the bill. I took a basic, no bake Oreo ball recipe and turned it into these adorable mummy truffles. What you'll need: 1 package of Oreos (I like to use double stuffed) 8 oz cream cheese, softened White chocolate candy melts Candy eyeballs Pulse the cookies in a food processor or blender until they are a fine crumb. Then combine with the cream cheese. You can add it directly to the food processor/blender or you can transfer the cookie crumbs to a stand mixer. Refrigerate the dough for 30 minutes to 1 hour so the dough becomes firmer and it's easier to roll out the dough balls. Using a cookie scoop, form 1-inch balls and place them in the freezer. In a small microwave-safe bowl, melt the white chocolate chips in 30 second intervals, stirring in between until smooth. Dip each Oreo truffle into the white chocolate coating, turning it to coat each side. Tap any excess off and transfer to a lined baking sheet. Drizzle the remaining chocolate over the top of the balls in a messy crisscross pattern to create the mummy bandages. Place in the refrigerator for 20 minutes, or until they set, then enjoy!
- Conchas
Concha are a beautiful Mexican sweet bread made with a crispy and delicious topping. The colorful bread is scored on top to create a patter that resembles a seashell, hence the name 'Concha.' It's traditionally served for breakfast with hot chocolate, coffee or milk. A truly classic comfort food you can easily make at home! Jump to the recipe Start by combining the yeast and warm milk with 1/4 cup of sugar in a stand mixer bowl. When warming the milk, you want to make sure it's not too hot, or it will kill the yeast, but not too cold, otherwise the yeast won't develop. I warmed my milk in the microwave for 1 minute and it was the perfect temperature. Lightly mix, until the sugar and yeast are moist and set it aside until the yeast has formed a foamy top layer, about 5 minutes. Your yeast mixture sure look like this when it's ready. The top layer will be foamy; however, the bottom layer will still be liquid. When the top layer is mostly filled with air bubbles, you are ready to mix in the other ingredients. Add the melted butter, remaining 1/4 cup of sugar, room temperature eggs, and vanilla. I like to mix these together in a separate bowl before adding them to my yeast mixture, so they incorporate evenly. You also want to make sure your eggs are at room temperature! If the eggs are too cold, they will prevent the yeast from developing further and the butter will begin to harden and could leave chunks in the dough. As you whisk in this mixture it will start to look like cake batter... it's supposed to! Add 2 cups of flour to the yeast mixture and whisk until it's well combined. You want to whisk it until the clumps and lumps disappear and you're left with a thicker looking batter. Transfer your bowl to the stand mixture and add your dough hook attachment. Add the remaining 2 1/2 cups of flour and 1 teaspoon of salt in small increments. Let the dough hook do the kneading work for you! It will take about 10 minutes on medium speed for the dough to start to form. The dough will be ready when you press your finger into it and dough doesn't stick to your finger. You may need to add more flour to the dough if it's still too sticky. Living in higher altitude, I add an additional 3 tablespoons to 1/4 cup of flour to my dough. Start with small increments and add more a little at a time to be sure you don't add too much flour. Too much flour and the dough will be more dense and not as soft. Your dough will look like this when it's done. Transfer the dough to a greased bowl and let it rise for 2-3 hours, or until it's doubled in size. You will want to place it in the warmest part of the kitchen, so it rises faster. On colder days, it can take longer to rise. While the dough is rising, you can make the sugary dough topping. Mix the flour and powdered sugar together until well combined. Add the butter and vanilla. Using a pastry cutter, cut the butter into the sugar, flour mixture. You will start to get what looks like a sugar cookie dough. If the dough is super sticky you can add more flour. Like the bread dough, it's ready when it no longer sticks to your finger. You can separate this dough and add in food coloring to make different colored Conchas. Traditional colors are pink, yellow and white. Once the dough has risen for a sufficient amount of time it should look like this. When you start to see air bubbles on the top, you know it's ready. Next, you want to place the risen dough on a floured surface and divide into 12 even balls. I like to start by cutting mine in half, and then half again to make sure I get more even dough balls. Roll each dough ball into a round concha shape by pinching it together. You will have a rough side (the bottom) and a smooth side (the top). Use your thumb and middle finger to make a small circle and gently roll it out into the shape. Preheat the oven to 350°F. Place each dough ball on a baking sheet lined with parchment paper. For each Concha, take about 1 tablespoon of the sweet dough topping and roll it out with a rolling pin into a thin circle. Make sure you flour your rolling pin, so the dough doesn't stick. Essentially, you're creating a little blanket for the Concha dough. You want it to just barely cover the dough ball. Too big, and it will hang over the sides and it will caramelize and get too crunchy while it bakes. With a sharp knife, score your pattern into the sweet dough. You can create a concha pattern, you can make a checkered pattern, or you can simply make lines. Either pattern will come out beautifully once the dough rises again and bakes. It's okay if the pattern isn't perfect! Loosely cover the baking pan with plastic wrap, or a towel and set the dough aside for another 60 minutes, or until the dough has doubled in size. Don't panic if the dough balls still seem small; they'll rise more when you put them in the oven. Once the dough has doubled in size, place in the preheated oven for 20 minutes, or until they turn golden brown. Let them cool and enjoy! Conchas Ingredients - For the Batter 2 1/4 teaspoons (1 package) active dry yeast 3/4 cup whole milk, warmed 1/2 cup granulated sugar, divided 1/2 cup (1 stick) unsalted butter, melted 3 large eggs, room temperature 1 tablespoon vanilla extract 4 1/2 cups all-purpose flour, divided 1 teaspoon salt Ingredients - For the Sweet Dough Topping 1 cup all-purpose flour 1 cup confectioner's (powdered) sugar 1/2 cup (1 stick) unsalted butter, softened 1 tablespoon vanilla extract Food coloring, if desired Instructions: Start by combining the yeast, 1/4 cup sugar and warmed milk in a stand mixer bowl. Lightly mix and set aside until the yeast has developed a foamy top layer, about 5 minutes. Add the butter, the remaining 1/4 cup of sugar, eggs and vanilla and whisk until well combined. In a separate bowl, mix the flour and salt together. Add this to the yeast mixture and whisk until a smooth batter forms. Transfer the bowl to the stand mixer, add the dough hook attachment and gradually add the remaining cups of flour. Mix until the dough is no longer sticky when you press your finger to the dough. This will take about 10 minutes. You can add additional flour, 3 tablespoons to 1/4 cup if the dough is still sticky. Transfer to a greased bowl and let the dough rise for 2-3 hours, or until it has doubled in size. For the sweet dough topping : Mix the flour and powdered sugar in a bowl. Add the butter and vanilla. Using a pastry cutter, but the butter into the flour and sugar until it becomes a sugar-dough like consistency. If the dough is too sticky, you can add additional flour, a little bit at a time. (Note: If you would like to make different color toppings, this is when you would divide the sugar dough and mix in the food colorings). Preheat the oven to 350°F. Line a baking sheet with parchment paper and set aside. Place the risen dough on a floured surface and cut the dough into 12 equal dough balls. Roll each dough ball into a round concha shape by pinching it together. You will have a rough side and a smooth, pretty side. Use your thumb and middle finger to make a small circle and gently roll it out into the shape. Place each dough ball on the prepared baking sheet. For each concha, take 1 tablespoon of the sweet dough topping and roll it out with a rolling pin into a thin circle, about the size of the concha dough ball. Drape over the concha ball. With a knife, carefully score the sweet dough topping to create a concha pattern. Loosely cover with plastic wrap or a towel and let the dough rise for another 30-60 minutes, or until the dough doubles in size. Once doubled, bake for about 20 minutes, or until lightly golden brown. Enjoy!
- Pigs in a Blanket
Looking for some game day snack inspiration?? Look no further!! My recipe uses crescent rolls for the dough and creates the perfect snack for any occasion. Jump to the Recipe Ingredients for Pigs in a Blanket: Lit'l Smokies - You might call them cocktail sausages or franks. I like the all beef smokies but you can use your favorite. They typically come in a package of around 42 mini sausages. I usually need to open two packages. Refrigerated crescent roll dough - Grab two tubs of 8 count crescent rolls each, not the full sheet dough. You'll see below how I slice the crescent rolls to make this pigs in a blanket recipe easy peasy. If you buy the full sheet, it will still work but just not as simple. Instructions Preheat oven to 375°F. Slice each crescent roll triangle into thirds to make 48 wedges. Wrap each lil smokies with one-third of a crescent triangle (one wedge) and place onto a baking sheet seam side down. Bake 15 minutes until the pigs in a blanket dough is cooked through and golden brown. QUESTIONS ANSWERED Can I prep pigs in a blanket the night before? Yes! BUT, do not wrap them more than the night before because you risk the dough from drying out. Make sure you cover the pan tightly with plastic wrap and refrigerate them until they're ready for baking. I also recommend transferring them to a different baking pan and not baking them on the cold one or you risk uneven baking. TIPS AND TRICKS Make more! These crescent roll pigs in a blanket disappear quickly, especially on game day. Definitely double or triple the recipe and bake more for a really large crowd. It's easy to make more or less as you need. Use a large baking sheet. You can fit a ton at once on a large baking sheet (I use my favorite big sheet pan lined with a silicone mat ) to entertain a large amount of guests. Leftovers store well in the fridge to quickly reheat the next day or two for lunch. Add cheese. Like a cheesy crescent dog? Roll a small piece of an American cheese slice with the lil smokies. Baking time will be the same. How to store leftovers. Store the pigs in a blanket in a sealed container for up to 1 week. Reheat in the microwave or oven. PIGS IN A BLANKET Ingredients 2 cans (8 oz. each) refrigerated crescent rolls 48 lil' smokies (or cocktail sausages) Instructions Preheat oven to 375°F. Open cans of crescent dough and separate into 16 triangles (as perforated in the dough) onto a cutting board. Slice each crescent triangle lengthwise into thirds. Place one sausage onto the wider side of triangle and roll up to the thinner side. Place on large baking sheet seam side down. Repeat with remaining sausages. Bake for 12-15 minutes until dough is baked through and golden brown.
- Buttery Soft Pretzels
Homemade soft buttery Pretzels you can pair with an endless variety of dipping sauces. They’re so easy to make you’ll wonder why you waited so long to make this delicious treat at home! Jump to the Recipe Have you ever had a craving that you just can’t shake? I’ve been craving hot buttery soft pretzels, the kind like you get at the mall, but better! I wanted a homemade pretzel that was chewy on the outside, but not so chewy they were tough! They also had to be fluffy and soft on the inside. The perfect combo…for the perfect “pull” when you tug them apart for dipping. I found an amazing Homemade Pretzel recipe from Alton Brown on the Food Network. It’s quick, easy, and in my ever so humble “carb expert” opinion, the BEST pretzel recipe out there! I can’t believe how easy, and fun, these Home Soft Pretzels are to make! So let’s get baking! How To Make Homemade Chewy Soft Pretzels In the bowl of a stand mixer, combine hot water, sugar, and kosher salt. TIP: Be sure the water temperature is 110 to 115 degrees. Water that is too hot can kill the yeast Sprinkle the yeast on top and allow to sit for 5 minutes or until the mixture begins to foam. You can lightly mix the yeast into the warm water. I find it helps to activate the yeast. Mixing the Pretzel Dough Add 2 cups of flour and 1/4 cup melted butter, using the dough hook attachment, mix on low speed. Add an additional 2 1/4 cup of flour. Continue mixing on low speed until all the ingredients are well combined. Change to medium speed and knead until the dough is smooth and pulls away from the side of the bowl, approximately 4 to 5 minutes. TIP: It’s important to increase the speed so that the dough will knead and cling to the dough hook. Remove the dough from the bowl, clean the bowl, or use a new clean bowl…I’m all about saving on washing dishes, oil the bowl well with vegetable oil. Return the dough to the bowl. Turn dough over so oil side is up. Cover dough with plastic wrap. TIP: I love the reusable plastic covers that I purchase in the plastic wrap aisle. You can wash and dry them and reuse them. They’re super handy! Place the covered dough in a warm place for about 50 to 55 minutes or until the dough doubles in size. Preheat the oven to 450° degrees F. Line 2 half-sheet pans with parchment paper lightly sprayed with non-stick cooking spray. Set the pans aside. In a large pot, 8 quarts or larger, bring 10 cups of water and 2/3 cups of baking soda…YEP…2/3 cups baking soda, to a rolling boil. How To Shape Pretzels While the water is coming to a boil, turn the dough out onto a slightly oiled work surface. I used my counter top and sprayed it with non-stick cooking spray. Divide the dough into 8 equal pieces. Roll out each piece of dough into an a 24-inch rope…just like making snakes with play dough! Make a “U” shape with the rope… Holding the ends of the rope, cross them over each other and twist…not your body…the dough. Press the ends onto the bottom of the “U” in order to form the shape of a pretzel. Place the formed pretzels onto the parchment-lined half sheet pans. Hot Water Bath for Pretzels Now for some FUN! Seriously this part is fun…but you need to be careful because that’s BOILING HOT water! This step is what makes the outside of the pretzels chewy! TIP: I ALWAYS place the pot on the BACK burner to prevent it from tipping over and spilling! Please always use caution when working with boiling fluids. Carefully place the pretzels into the boiling water, 1 by 1, for 30 seconds. I used a large flat spatula to place the pretzels into the boiling water and to gently splash water over the top of each pretzel. Slide the spatula under the pretzel and remove from the boiling water. Note: They’ll rise slightly in the boiling water. Return the pretzels to the half sheet pan. Brush the top of each pretzel with the beaten egg yolk and water mixture, or “egg wash” and sprinkle with pretzel salt. (This step adds the final “chewy” factor and allows the salt to stick!) Bake until golden brown in color, approximately 12 to 14 minutes. Transfer to a cooling rack for at least 5 minutes before serving! If you’re going to eat them immediately…and I double dog dare ya not to…brush them with melted butter! BUTTERY SOFT PRETZELS Ingredients 1 1/2 cups warm water 1 Tablespoon sugar 2 teaspoons kosher salt 1 package active dry yeast, or 2 1/4 teaspoons 4 1/2 cups all-purpose flour 1/4 cup melted butter 10 cups water 2/3 cups baking soda 1 large egg yolk with 1 Tablespoon water Pretzel Salt Non-stick cooking spray Instructions Combine the water, sugar, and salt in the bowl of a stand mixer and sprinkle the yeast on top. Allow to sit for 5 minutes, or until the mixture begins to foam. Add the flour and melted butter using the dough hook attachment, mix on low speed until well combined. Change to medium speed and knead until the dough is smooth and pulls away from the side of the bowl, approximately 4 to 5 minutes. Remove the dough from the bowl, clean the bowl, or use a new bowl, and then oil the bowl well with non-stick cooking spray. Return the dough to the bowl, turn dough over to oiled side up, cover with plastic wrap and sit in a warm place for approximately 50 to 55 minutes or until the dough has doubled in size. Preheat the oven to 450 degrees F. Line 2 half-sheet pans with parchment paper and lightly brush with vegetable oil. Set aside. Bring the 10 cups of water and the baking soda to a rolling boil in an 8-quart saucepan. In the meantime, turn the dough out onto a slightly oiled work surface and divide into 8 equal pieces. Roll out each piece of dough into a 24-inch rope. Make a U-shape with the rope, holding the ends of the rope, cross them over each other, twist, and press onto the bottom of the U in order to form the shape of a pretzel. Place onto the parchment-lined half sheet pan. Place the pretzels, carefully, into the boiling water, 1 by 1, for 30 seconds. Remove them from the water using a large flat spatula. Return to the half sheet pan, brush the top of each pretzel with beaten egg yolk and water mixture and sprinkle with the pretzel salt. Bake until dark golden brown in color, approximately 12 to 14 minutes. Transfer to a cooling rack for at least 5 minutes before serving. Brush with melted butter if serving immediately.
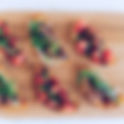
- Crostini Toasts - Bruschetta and Prosciutto
If you ever need a beautiful, flavor-packed, all-occasion appetizer, look no further than crostini. Today I’m sharing three delicious crostini recipes that you can make for your next celebration. Jump to the Recipe In case you’re not familiar with crostini, it’s a tiny, open-faced sandwich. Like a sandwich, it’s layered with ingredients such as meats, cheese, fruit, veggies, and spreads. What’s not to love, right? To get started, you’ll need a baguette. I like to slice it on a diagonal. Doing this creates larger, fancier-looking slices. Place the bread slices in a baking pan, brush them with extra virgin olive oil, and sprinkle them with salt and pepper. Then pop the pan into your oven on broil for 4-5 minutes or until the bread is lightly browned. Toasting the bread this way not only adds flavor and crunch but also makes it a sturdy support for the toppings. While the bread cools, gather and prepare your toppings. I’m sharing two different recipes. Each one makes 24 crostini, give or take. This bruschetta with tomato and basil recipe is a quick and easy appetizer for holiday or game day parties. A delicious mixture of Roma tomatoes, fresh basil, olive oil and balsamic vinegar served on toasted bread slices. Make the tomato and basil topping one day ahead of time and stored in the fridge until ready to serve. Ingredients Needed Tomatoes: Ripe Roma tomatoes are the best variety for making this recipe but any ripe tomato can be substituted. The core and seeds are removed to reduce the moisture content. Fresh Basil: Fresh basil is a must when making this recipe. Do not use dried basil. Olive Oil: An extra virgin olive oil is recommended, but any quality olive oil that you would enjoy eating on a salad will work. Balsamic Vinegar: A small amount of balsamic vinegar will be added to the chopped tomatoes as well as made into a reduction to drizzle over the top of the finished appetizer when served. Salt and Pepper : Start with ¼ teaspoon of salt, taste and add more if desired to make sure it's not overly salty. Garlic: A garlic clove is rubbed on the bread before toasting to add an additional layer of flavor to the dish. Instructions Cut the tomatoes in half, remove the insides (core and seeds) and dice the flesh into small pieces. Mix the the chopped tomatoes with the olive oil, fresh basil, balsamic vinegar, salt and pepper. Keep the tomato mixture chilled until ready to serve. Serve on the toasted bread slices garnished with feta cheese crumbles (optional) and a drizzle of balsamic reduction. For the second crostini, I paired together flavors inspired by a charcuterie: Brie, Balsamic vinegar, and Prosciutto Crostini. My mouth waters just thinking about this Brie, balsamic vinegar, and Prosciutto Crostini. Inspired by a charcuterie, the wonderful flavors of this crostini will delight you and your guests, whether you’re hosting a large gathering or an intimate dinner. I began by adding a slice of creamy brie followed by thinly sliced prosciutto. Some peppery arugula tossed lightly with olive oil and salt and pepper finished off the top and then a drizzle of balsamic vinegar to enhance all of the flavors. CROSTINI APPETIZERS FOR THE BRUSCHETTA INGREDIENTS TOMATO TOPPING 7 medium Roma tomatoes 2 tablespoons extra virgin olive oil ¼ teaspoon salt ⅛ teaspoon black pepper ¼ cup chopped fresh basil 2 teaspoons balsamic vinegar BRUSCHETTA 1 baguette (or loaf of French bread) 2 tablespoons olive oil 1 clove garlic GARNISH 1 cup balsamic vinegar (for balsamic reduction) ¼ cup feta cheese crumbles INSTRUCTIONS Toast bread: Preheat oven to 450°F . Cut the baguette into ½" thick slices, on the diagonal, and arrange them in a single layer on a baking sheet. Brush both sides with olive oil. Cut a garlic clove in half and rub each slice of bread. Bake for 7-10 minutes or until the bread is golden brown. Prepare tomatoes: Cut the tomatoes in half and remove guts and seeds. Dice the flesh into small pieces. Place the pieces into a mixing bowl. Combine: Add the olive oil, 2 teaspoons balsamic vinegar, chopped basil, salt and pepper and toss to combine. Taste for salt. To serve: Scoop the fresh tomato mixture onto a slice of bread and sprinkle with feta cheese and a drizzle of balsamic vinegar reduction. FOR THE PROSCIUTTO INGREDIENTS 1 baguette 1/4 cup extra virgin olive oil Salt and pepper 8 ounces Brie 4 ounces prosciutto - thinly sliced 1/2 cup fig jam 2 cups baby arugula 1 tablespoon extra virgin olive oil Salt and pepper INSTRUCTIONS Begin by diagonally slicing the baguette. Then, place the slices in a single layer on a baking sheet. Brush them with olive oil and sprinkle with salt and pepper. Place the baking sheet on the top rack of your oven and broil the bread 4-5 minutes until it is golden brown. Set aside to cool. In a small bowl, gently toss together the arugula, olive oil, and a little salt and pepper. Top with a slice of brie and prosciutto. Finish it with off with a few pieces of arugula.